| Overview | Review current inventory |
| Add Inventory using Purchase Orders | Inventory Log |
| Upload Inventory | Sales & Returns |
| Adjust Inventory in Product Details |
Overview
- Inventory can be added by utilizing purchase orders or manually at the product level.
- The sale of an item will decrease the inventory level in the product details.
- Inventory logs are available to track SKU activity.
- Quantity on hand can now be viewed by location in the product details.
Add Inventory using Purchase Orders
- Use Purchase Orders to add inventory to large groups/categories of products.
This is the recommended way to initially add your inventory to your POS during onboarding.
- To begin, navigate in Admin to Inventory > Purchase Orders and click "Create purchase order".

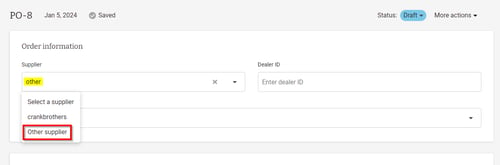
- Click into the "Supplier" field and type "other", then select "Other supplier".
- Click into the "Supplier" field again and enter the name of your bike shop.
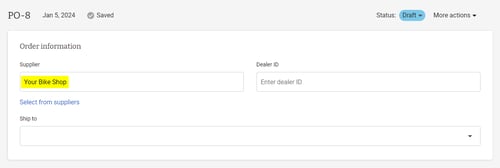
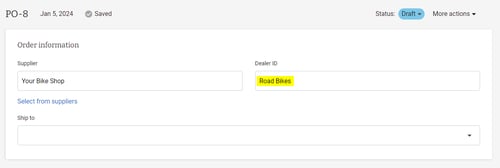
- If desired, click into the "Dealer ID" field and enter the category the PO will contain.
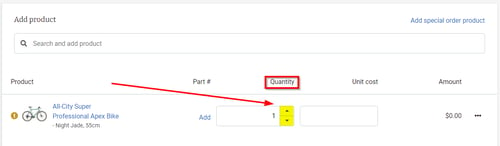
- Click into the "Add product" field and scan your inventory while manually adjusting quantities as you go.
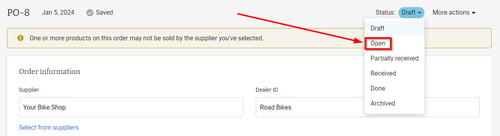
- Once all your inventory in that category has been added, click the Status drop-down arrow at the top of the page and select "Open".
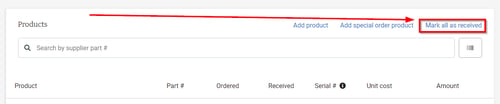
- Scroll down to the Products section and receive the products by clicking "Mark all as received".
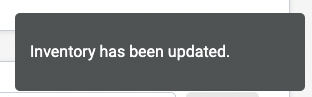
- Once the products are received, you will see a confirmation notification at the bottom of the screen.
- If desired, click the Status drop-down arrow and select "Done".
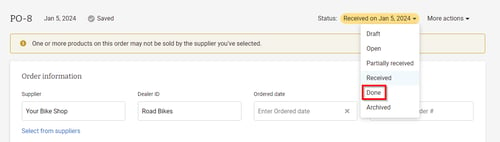
- All received inventory will now be displayed in the Inventory tab of the product details of each product.
Navigate in Admin to Inventory > Products, search for the item, and click the green edit pencil to view the product details.
Upload Inventory
The Bulk Upload Inventory tool can be used to make Inventory changes in bulk by category, brand, or any other available filter in Inventory > Products.
- For example, to upload inventory for a specific category in your catalog, navigate in Admin to Inventory > Products, select the desired category, and click "Download".

- On the following screen, scroll to the bottom and click "Download Inventory File".
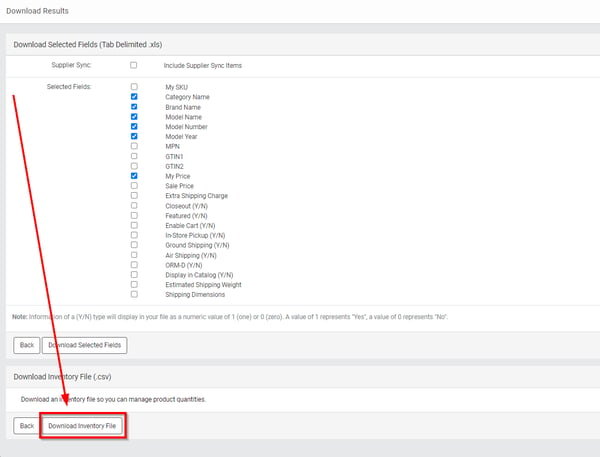
Do not worry about selecting fields as that section does not apply when downloading an inventory file.
- Open the downloaded inventory file and enter the new inventory quantity in the "New QoH" field.
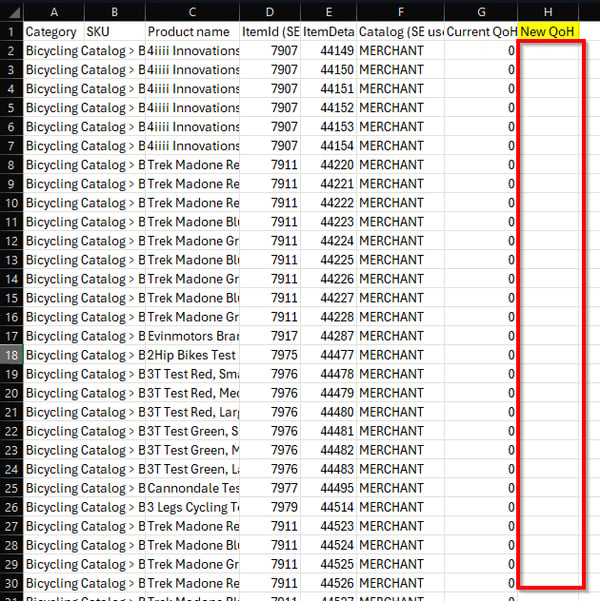
- Save the file once all the new inventory quantities have been entered.
- Return to Workstand Admin, navigate to Inventory > Products, and click "Upload".
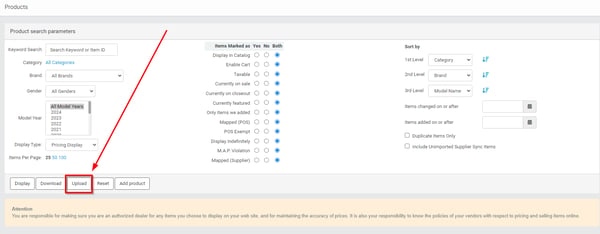
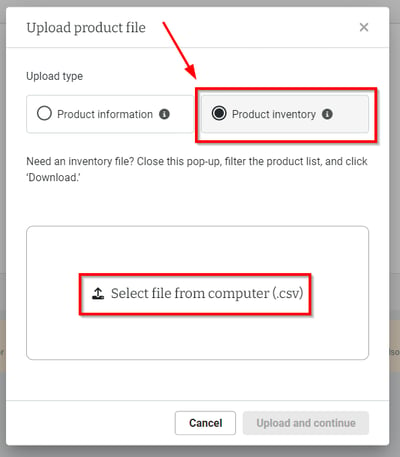
- In the modal that pops up, select "Product inventory" as the Upload type, then click "Select file from computer (.csv)"
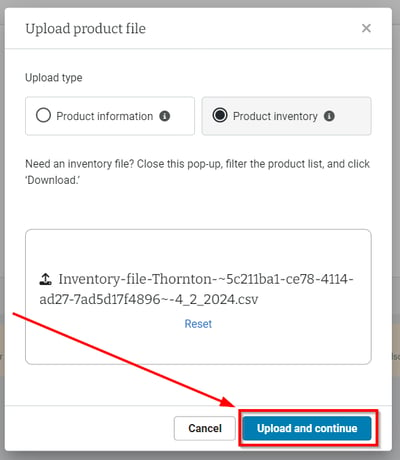
- Locate the file on your computer, select it, and click "Upload and continue".
- Once uploaded the Upload summary will appear at the bottom of the modal.
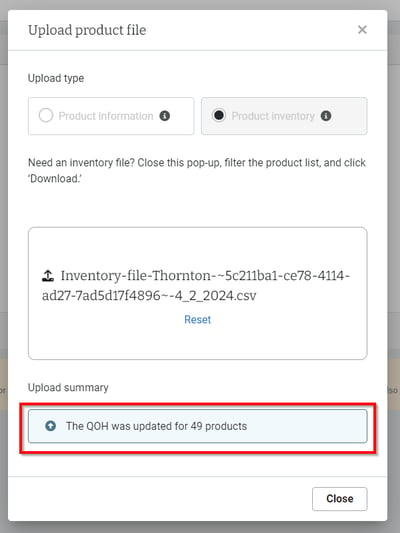
- Click "Close" to close the upload product file modal.
Adjust Inventory in Product Details
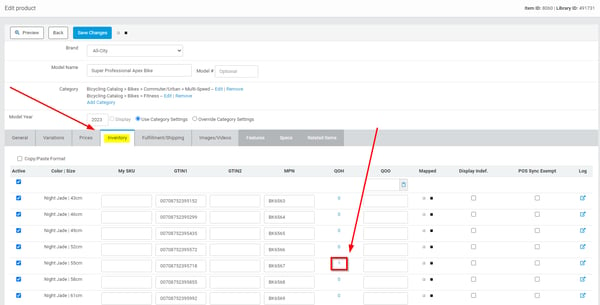
- To manually adjust the inventory level of an item, navigate in Admin to Inventory > Products and locate the product whose inventory you'd like to adjust.
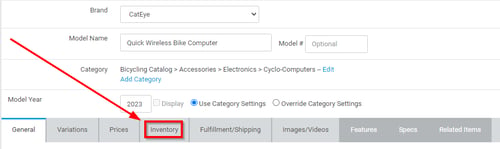
- Click the green pencil to enter the product details and then view the Inventory tab.
- The number in the QOH (Quantity on Hand) column for each variation represents your available inventory.
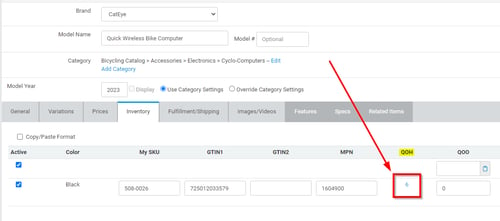
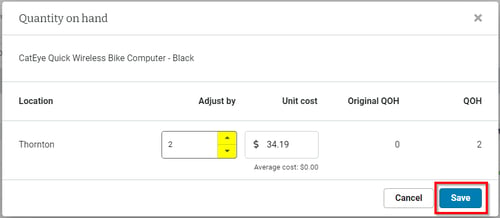
- Click on the blue number to make manual adjustments in the modal that pops up.
- The modal will allow inventory levels to be adjusted up or down by using the up and down arrow buttons. Unit cost can also be set at this time.
- Once the adjustments have been completed, click "Save" to record the inventory changes.
Inventory Log
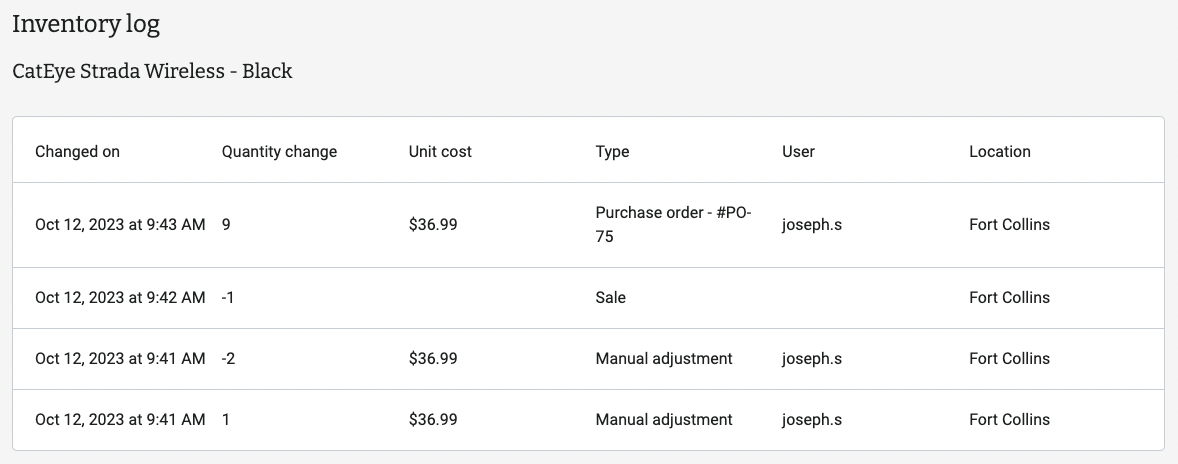
- To view the inventory log, click on the blue box arrow icon in the "Log" column of the SKU you wish to view.
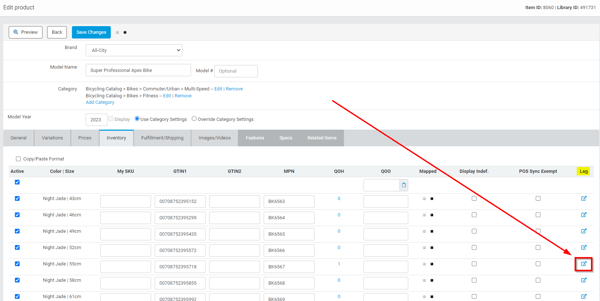
- The inventory log reflects all adjustments made to the QOH of a SKU, including manual adjustments, sales, and inventory received on purchase orders.
Download a report of current inventory
A report of your current inventory can be downloaded from Inventory > Products. Since this may be a large file, our system doesn't allow a full download. We suggest download by category, or other smaller segments to filter by. Download these reports, then merge the spreadsheets to see a report of your current inventory.
Here's one way to do this:
- Navigate to Inventory > Products and select Categories > All Categories
- Choose Bicycles, for example, and click OK.
- Select Download. You can also click Display to see the list before choosing download.
-
- Scroll to the bottom, select a location, and click Download Inventory File

- Scroll to the bottom, select a location, and click Download Inventory File
- Repeat as needed for full download.
Sales & Returns
- Creating a sale automatically decrements your inventory for the products on that sale.
- Returning or exchanging products on a sale does not adjust your inventory level.
- Inventory will need to be manually adjusted if you elect to put returned or exchanged products back into stock.
- For more information on creating and managing sales, please refer to these articles:
These features are for users who do not have a third-party POS connected via POS Sync. If an external POS is connected the inventory levels for any mapped items will be overwritten by the counts in that external system.