Page Editor - Build/Edit a Responsive Page
Add content to a responsive page by selecting a content block and dragging it onto the page.
Create a New Page
- To create a new (responsive) page, navigate in Admin to Website > Page editor.
- Click "Add Page" at the top of the screen.

- Select "Responsive Page" from the page options list.

Add Content Blocks
- Add page content by adding content blocks.
- Mouse over the upper left corner of the responsive page to open the sidebar to display all block options.

- Click on a block type (1 Column, 2 Column, etc.) to view the available pre-built blocks of that type.

- Select a block and drag and drop it where you want it on the page.
Edit Content Blocks
Gear Icon
- The gear icon in each content block's upper right corner provides access to Section Settings and Section Source.
- From here, you can also reset, clone, or delete the section.

Section Settings
- Set Start/End dates for this section.
- Set a CSS class for the section.
- You will add the CSS that refers to this section in Page Settings, or within Template Publisher.
- Make the section full-screen width. (This does not work for Catalog sections.)
- Make the section inactive.
- Add a background image or color (style).
- This will display full width across the page if it's a 1-column, or behind the entire section of any other block layout.

Reset Section
- Clears the changes you've just made and reverts to the last version saved.
Clone Section
- Create a copy of the content block.
Delete Section
- Deletes the content block.
Column Settings
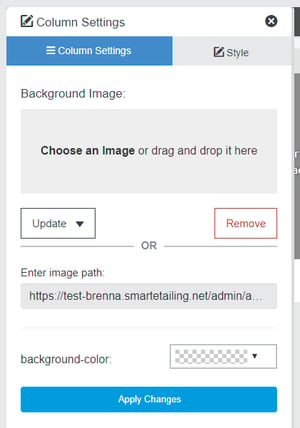
- Mouse over the upper left corner of the content block so the "Edit Column Settings" button is visible and click within the blue dash box to enter the column settings section.

- Within the Column Settings, you can add a background image or color, as well as add a class name to style the column as configured in page-specific or template CSS.

-
- Images or colors entered here will fill the section, going edge to edge on the viewer's screen.
Edit Content
- Mouse over the middle area of the content block so the "Edit Content" button is visible and click within the blue dash box to access the edit content section.

- From here you can add text, images, and video to the content block.

-
- The editor provides a range of editing tools similar to those found in many content and text editors and also includes an HTML editor.
- Mouse over any icon for a description.
- To replace a placeholder image simply click on the light grey placeholder.

-
- When uploading a new image to replace a current image, the same aspect ratio/crop will be automatically applied to the new image.
- If you want an image with a different aspect ratio, delete the placeholder before uploading your image.
- The minimum size/aspect ratio is listed when you click Edit Image.
- If you want a different part of the image to show up, click Edit Image > Crop.
- This allows you to adjust what part of the image appears within the allotted space.
Image Tips
- When prepping images for upload, make sure you're sizing well and compressing the image when needed, or using a lower quality to reduce file size, as this will impact page load speeds if you have many large files/images.
If you are attempting to upload an image and the image will not upload, or times out, this is likely due to the image being too large. Try compressing the image and then try to upload it again.
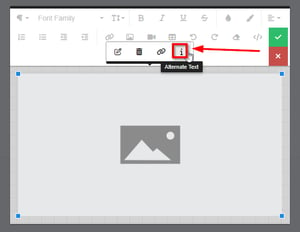
- Be sure to add Alternative Text for all uploaded images.

-
- Each image you add to your site should be named well and have text that describes what the image contains. (not "Picture of ...")
- This is required by the Americans with Disabilities Act (ADA) and can be helpful to search engines and any consumer.
- Click here to learn more about our Recommended Image Sizes for various content blocks.
Special Content Blocks
- Once added to the page these blocks have a Create button you select to edit or add the content.

Catalog -1.png?width=30&height=30&name=small%20owl%20video%20play%20(30%20x%2030%20px)-1.png)
- Drag the section onto the page and click "Create".
- Enter the page title and description in the Basic Settings tab.
- In the Selection Parameters tab, select a category, brand, or other criteria to create the catalog section.

If using more than one 1 selection parameter, "Categories" must always be checked, in addition to having the categories that the products are in selected as well.
- Select Carousel or Tabular on the Display Options tab.
- Click "Save Settings" and "Save Changes".
Location
- Drag the section onto the page and click "Create".
- In the "Basic Settings" tab enter the Title and Description.
- In the "Display Options" tab select the desired store from the "Linked Store" drop-down and the map layout from the "Layout" drop-down.

- Click "Save Settings" and "Save Changes".
During onboarding a Responsive location page is created for each location to provide your local customers with more information about it.
HTML
- Create a custom content block using html.
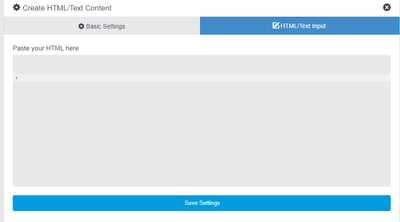
- Drag the section onto the page and click "Create".
- In the "Basic Settings" tab enter the Title and Description.
- In the "HTML/Text Input" tab paste your HTML into the box.

WYSIWYG
- Create a custom content block that isn't pre-formatted.
- Drag the section onto the page.
- Mouse over the middle area of the content block so the "Edit Content" button is visible and click within the blue dash box to access the edit content section.
![]()
- From here you can add text, images, video, and custom code to the content block.

- Mouse over any icon for a description.
- Once editing is complete, click the green check box and then click "Save Changes".
Slideshow
- Slideshow is an option under the "1 Column" content block type.
- We don't generally recommend using these for the following reasons:
- They slow page load times.
- They don't work well on mobile devices or with screen readers.
- They are not good for search engine optimization.
Tips & Tricks
- Preview the page by saving changes and clicking the preview button in the upper right corner.
![]()
- Click here to view our image size recommendations for content blocks.
- View how the page will look like on different devices by selecting the Mobile or Tablet icon from the top-left corner.

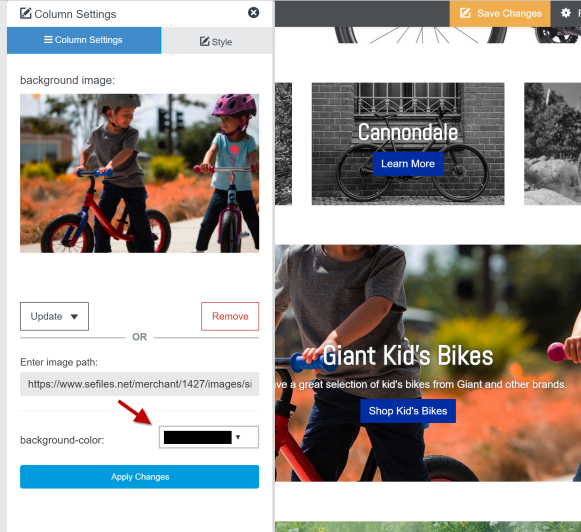
- To ensure white or light-colored text is readable if images don't load (and to prevent contrast errors in tools used to test for ADA compliance) add a dark background color along with any image you add in Column Settings or Section Settings.

Add Padding to a Content Block
- Show more of a background image by adding padding.
- Click "Edit Content" and then click the </> icon to get to the code view.
- Add <div style="padding: 10%;"> to the very top of the code
- Add </div> at the very bottom
- Click </> again to see the spacing it added.
- Save Changes to Preview your page.
- Adjust the percentage in the code to have more or less padding
