Special Orders
Mark items in a sale as special orders, manage special orders, and add them to purchase orders in Workstand POS.
Add Special Order to Purchase Order
Create a Special Order
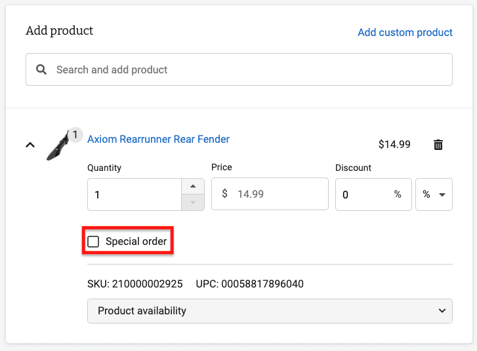
- Special orders can be created during a sale.
- Once an item has been added to a sale, find and select the "Special order" box. Products that are not currently available in store will have this box selected by default.

Items must be marked as special order before the sale is completed.
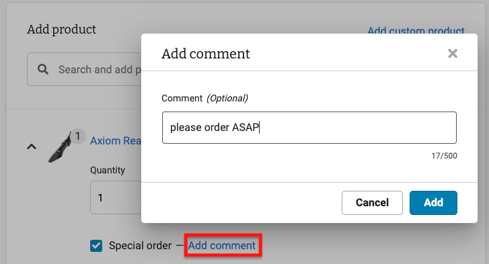
- If you'd like to add a comment about the special order, click "Add comment" next to Special order, input your comment (500 character max), and click "Add".

- Comments can be viewed and edited within a sale, and appear in the Special Orders list once the order is complete.
View Special Orders
- To view a list of all special orders, navigate in Admin to Inventory > Special orders.
- Products are listed in chronological order, with the most recently marked product at the top.
- The list shows the Product, Price, Quantity, Sale number, Comment (if present), Sale date, and Purchase order # (once the item is added to a purchase order).
- Click "View comment" to see any notes entered in the sale that the special order originated in.

- A purchase order can also be created from this screen.
- The list of special orders can also be accessed from Inventory > Purchase orders by clicking "View special orders".
Add Special Order to Purchase Order
- In Admin navigate to Inventory > Purchase orders and find the desired purchase order.
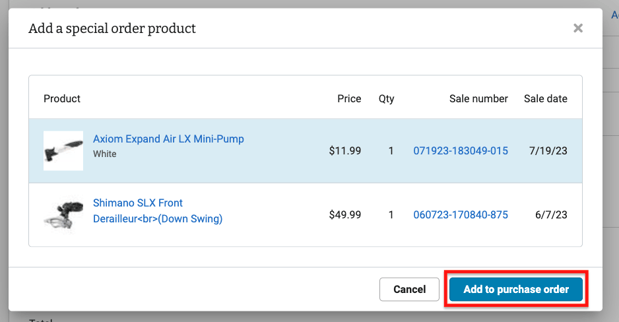
- Click "Add a special order product".

- A window will open displaying items marked for special order that are not yet assigned to a purchase order.
- Select an item, and click "Add to purchase order".

NOTE: Only one item can be selected and added at a time.
- The item will appear in the Product section of the purchase order, marked with a star icon.

- Click on the star icon to view details, including Sale number, Customer, Phone number, and Comment.
- The Purchase order # will now be visible on the Special orders list screen.
