Convert a Sale to a Work Order
- You may want to convert a sale to a work order, for instance, if you have already started a sale for some components and the customer then informs you that they need the parts installed.
- To convert a sale to a work order, click "More actions" in the upper right corner.

- Select "Convert to work order" from the dropdown.
- The header text will change from "New sale" to "New work order", a Bike Description and Service notes field will appear, and a section to add services and products.

- The same process can be used to convert a work order into a sale.

Create a Work Order
- Navigate in Admin to Service > New work order or Service > Work Orders and select "Create work order".

Attach a Customer
- Use the search bar under Attach customer to search by first name, last name, email address, or phone number. Search results will appear as you type.
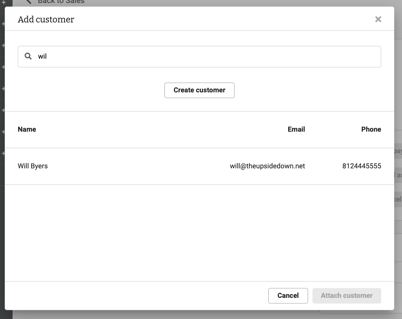
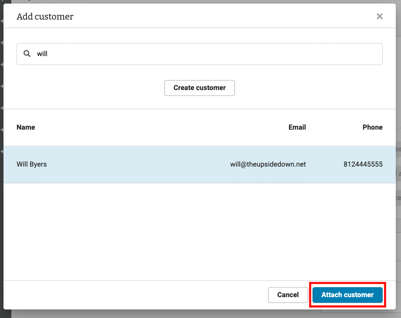
- Select the customer and click "Attach Customer".
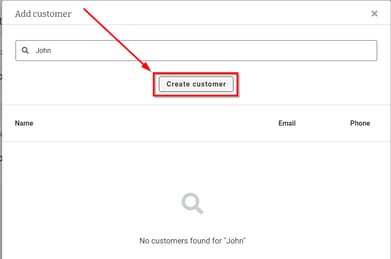
- If you don’t find the customer in the search, click “Create Customer”.
- Enter the customer’s information, then click "Attach customer".
- An email address is required.
Add Bike Description & Service Notes
Bike Description
- Briefly describe the bike being serviced.
- The bike's serial number can be added here if desired.

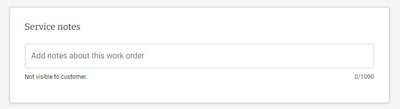
Service Notes
- Add any service notes about the work order.
- These comments save automatically and are not visible to the customer.
Add Products & Services
Services
- To add a service to the sale, use the search bar designated "Search and add service" under Services and Products.

- A modal will appear as you type showing service and labor based on your search term.

- Select the desired service (multiple services can be selected at once) and click "Add service".

- Click here to read more about Labor & Service SKUs.
Products
- To add products to the sale, use the search bar designated "Search and add product" under Services and Products.

- A modal will appear as you type showing products based on your search term.
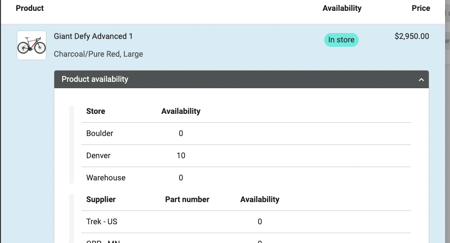
- The results will display whether a product is in stock In store or At supplier.

- Click on a product to select it, then click "Add product".

- (Optional) For a more detailed look at the product availability, click on the down arrow in "Product availability" and you will be able to see where the item is located.
Add a Custom Product
-
In the Services and products section click "Add custom product" to create a custom item or service.

Custom items will not be saved to the Product List.
- In the modal that pops up, add the Brand name, Model name, price, and quantity, select if the product is taxable, and then click "Add product".

- Your custom product will display below any previously added products or services.

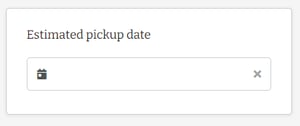
Add Estimated Pickup Date
- Add an estimated pickup date by clicking on the calendar and selecting a date.
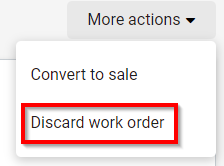
Discard a Work Order
- To discard a work order that you're drafting before taking payment, click "More actions" at the top right of your screen.
- Select "Discard work order" from the drop-down.
Save a Work Order
- To save the work order, click either "Take payment" or "Save and pay later".
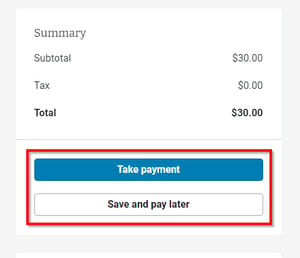
If you navigate away from the work order before either "Take payment" or "Save and pay later" is selected, the changes will be lost and the work order will not be saved.
Take Payment
- To take payment when the work order is created select "Take payment" in the payment summary box.

- For further instructions on how to take a payment, click here.
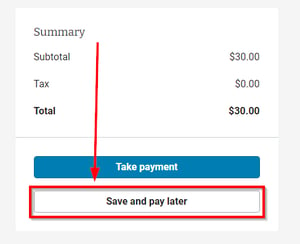
Save and Pay Later
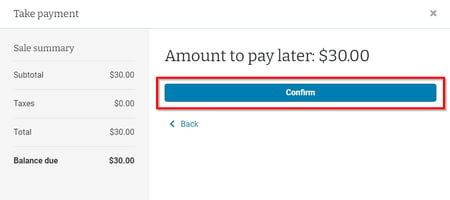
- To take payment when your customer picks up their bike, click "Save and pay later" in the payment summary box.
- Confirm the amount to pay later.
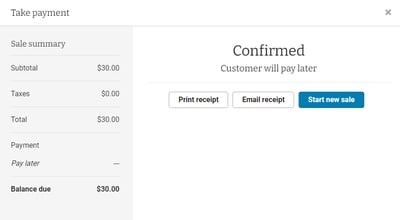
- Confirmation and the sale summary will then be displayed, along with the option to "Print receipt", "Email receipt", or "Start new sale".
Assign a Mechanic
- After the work order has been saved (Save a work order), you can assign a mechanic.

- The list of mechanics is populated from the User Accounts in Settings > Account > User accounts.
- All users in the User Accounts list will appear in the mechanic list regardless of their permissions.
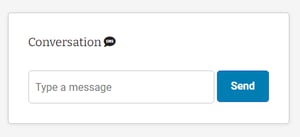
Text your Customer
- After the work order has been saved (Save a work order), you can use the Conversation box to send text messages to your customers with work order updates or ask them questions.
- Click here for setup and additional info about Conversations.
Search, Sort & Filter Work Orders List
- The Work Orders list can be searched (by work order # or customer phone number), sorted, and filtered based on how you would like to view the list.
- Top-level information in the Work Orders list includes Work order #, Date created, Pickup date, Customer, Bike description, Status, Total time, Mechanic, and Total cost.
Search
- Work orders can be searched using their Work order # or customer phone number in the search bar.

-
- The search function is currently numeric only.
Sort
- The Work Orders list can be sorted by Date created or Pickup date.

Filter
- Work Orders can be filtered by Pickup Date (range) and status.
- The default filter for the Work Order list is to display work orders with a status type of "New" and "Pending" and to hide work orders with a status type of "Complete" and "Canceled", with no pickup date range selected.

- To adjust the filters, click the "Filter" button in the Work Orders List.

-
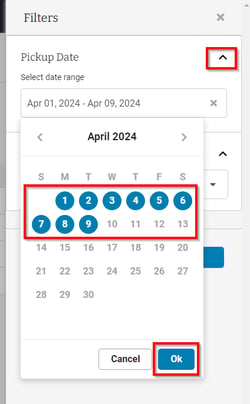
- To select a Pickup Date range click the down arrow next to "Pickup Date", make your selections, and click "Ok".
-
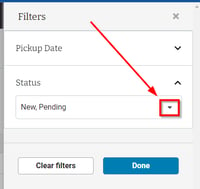
- Click the down arrow next to the default selections to change the status type displayed.
-
-
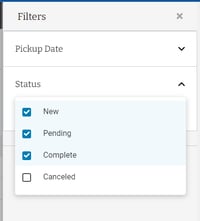
- Add or remove status' by checking or unchecking the associated boxes.
-
-
-
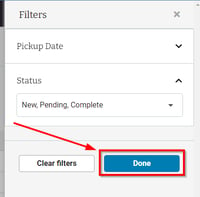
- Click anywhere outside the selection box in the slide-out window to collapse it, and then click "Done" to apply the changes.
-
- Click here for more information on Work Order Statuses.