Create New Sale
- In Admin, navigate to Sales > New Sale or search for "new sale" in the search bar at the top of Admin.

You can attach a customer and add products in whichever order you choose,
depending on your preferred workflow.
Attach Customer
- Customer information is not required to create a sale.

- Use the search bar under Attach customer to search by first name, last name, email address, or phone number. Search results will appear as you type.
- Select the customer and click "Attach Customer"
- If you don’t find the customer in the search, click “Create Customer”.
- Enter the customer’s information, then click "Attach customer".
- An email address is the only required field.
- First name, last name, and phone number can also be entered at this point.
Add Catalog Products
- To add products to the sale, use a bar code scanner or the search bar under Add Product.
- If the bar code scanner finds the product it is automatically added to the sale.
- If you are searching/typing to find the product a screen will open with products and their availability.
- The default view is In store but can be changed to At Supplier, or All if you are searching for a product you know you do not have in Stock.
- At Supplier will show the list of products from all your active Supplier Sync partners.
 (Optional) For a more detailed look at product availability, click the down arrow in "Product availability down arrow to see exactly where the product is.
- Select a product and click "Add product".
- Products that are not currently available in store will be automatically flagged as Special Order.
- A list of Special Orders can be found under Inventory > Special orders.
- Update quantities as desired.
Serial number tracking at the item and sale level is coming soon. To record a serial number with a sale, please enter it in the Comment field, or add a custom product with Brand =Serial and Model name = serial number.
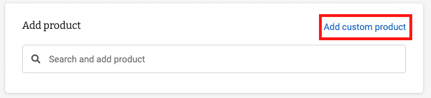
Add Custom Products
- To add a new non-catalog product to a sale, click "Add custom product".
- In the modal that pops up, add the Brand name, Model name, Price, and Quantity, then click "Add product".
- By default, custom products are marked as taxable.
- The custom item will appear on the sale screen as a line item.
- Click the down arrow next to the product to adjust quantity and price, add a discount, mark the product as special order, and/or change it's taxability.

Custom products do not exist in your online catalog.
The ability to "Email as cart" is unavailable when custom products are in a sale.
Discount a Product
 Click the down arrow to the left of the product to enter a discount.
- Enter the discount amount for any line item on the sale.
- Choose either dollar or percent.
Convert to Work Order
 You may want to convert a sale to a work order if, for instance, you have already started a sale for some components and the customer then informs you that they need the parts installed.
- To convert a sale to a work order, click the "More actions" drop-down menu on the top right of the screen.
- Select "Convert to work order".
- The header text will change from New sale to New work order, and a "Bike description" and "Service notes" field will appear.

- You can use the same process to convert a work order back to a sale.
Find more information on work order creation and management here.
Add Comment
- Comments are not visible to the customer, but are logged to the comment record of the sale for internal reference.

- You can add a comment of up to 200 characters to a sale:
Discard Sale
 To discard a sale that you're drafting before taking payment, click "More actions".
- Select Discard sale from the drop-down.
Take Payment
- Click "Take payment" on the right side of the screen.
- Select the payment type.
Take Credit Card Payment
- If you are using our Stripe integration and the BBPOS WisePOS E terminal, confirm that the terminal is turned on and connected.
- A message stating "Terminal ready" will display at the bottom right of the sale screen.
- Click "Take payment".
- Select "Credit card" as the payment type.
Note: Customer details will display in the blank space above "Pay later".
- The sale total will be displayed on the terminal for your customer.

- Have your customer swipe, insert, or tap their card or compatible device.
- The terminal will display “Processing”, then "Remove card", if card is inserted.
- The terminal will display "Approved".
- Simultaneously the sales screen will display “Payment processing”, then “Payment complete”.
- If card is not approved terminal and sale screen will show "Declined"
- See Stripe Card Reader Setup Instructions
Take Manual Credit Card Payment
-
In the payment drawer, click "Take payment".

- Select "Credit card" as the payment type.
- Under the payment total, click "Manual card entry".
- Enter the requested credit card information and click "Take payment".
- The terminal will display “Processing”, and then "Approved".
- If the card is not approved, the terminal and sale screen will show "Declined".
- Stripe charges an extra 0.5% fee on top of their other fees for manual card entry. Click here for more information on Stripe fees.
Take Cash Payment
- Click "Take payment" on the right side of the screen.

- Select "Cash".
- Select, or enter, the cash amount and click "Take Payment".
- If your cash register is closed this is noted.

- You can click Start a new session, adding a comment if necessary. Learn more about managing the cash register here.
- If your cash register is closed this is noted.
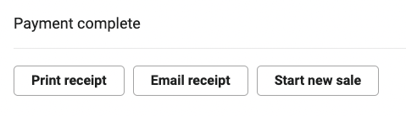
- The amount of change due will appear, along with the options to "Print receipt", "Email receipt" and "Start new sale".
Save and Pay Later
- On the ride side of the sale, click "Save and pay later".

- Click "Confirm".

- A confirmation message will then display with the options to "Print receipt", "Email receipt", and "Start new sale".
Print/Email Receipt
- Once the payment is complete you can choose to "Print receipt", "Email receipt", or "Start new sale".
- Receipts can be printed on a thermal printer or a desktop printer on 8.5" x 11" paper.
- Click here for thermal printer setup instructions.
- You can alternatively choose to save the receipt as a PDF.
- The receipt email will come from the email address listed in Settings > Website > Store Information > General Inquiries Email.
- It's optional to send the receipt to a differenct email address than what's saved in the customer record.

- It's optional to send the receipt to a differenct email address than what's saved in the customer record.
- If you choose to print the receipt, you can subsequently choose to email it as well.
- Likewise, if you email the receipt you can still choose to print it.
Note: Creating a sale automatically decrements your inventory in Inventory > Products for the products on that sale. If you have an external POS connected via POS Sync you will need to export your sale or adjust the inventory level for the products separately in that system.
View Completed Sales
- Navigate in Admin to Sales > In-store sales to view the sales list.
- For more information on the Sales list, click here.
Additional Info
- For information on how to manage orders for your website, click here.